Holiday Hunting With Aquatone
Hello, folks!
Before going to the blog, I would like to give a little context on what happened here. I went on a workcation in April 2022 with my hacker friends (@N0_M3ga_Hacks, @AyushBawariya1 and @x30r_). We hacked during the day and partied in the evenings.
One day, I was telling @N0_M3ga_Hacks about how easy it was to hunt on a specific target in Synack Red Team. That it was full of vulnerabilities. I was telling him that I have found many vulnerabilities just by running aquatone on the in-scope HTTP servers. I did not even need to do a port scan to find other HTTP services on different ports like 8443,8080 etc.
While telling him about this, I thought, “Let me show him in practice” and I went ahead and ran httpx on all the in-scope IPs and found live HTTP services. Then I ran aquatone across all the IPs.
From here, we found a total of 3 vulnerabilities that are as documented below:
| Vulnerability Title | Reward |
|---|---|
| SSRF Allowing To Access Google VM Metadata | $2400 |
| SSRF Allowing To Access Internal Ports | $500 |
| Exposed XXXX Portal Revealing Tickets | $705 |
SSRF Allowing To Access Google VM Metadata⌗
What stood out from the aquatone results was a web page test application. The web root of the application looked like the following:
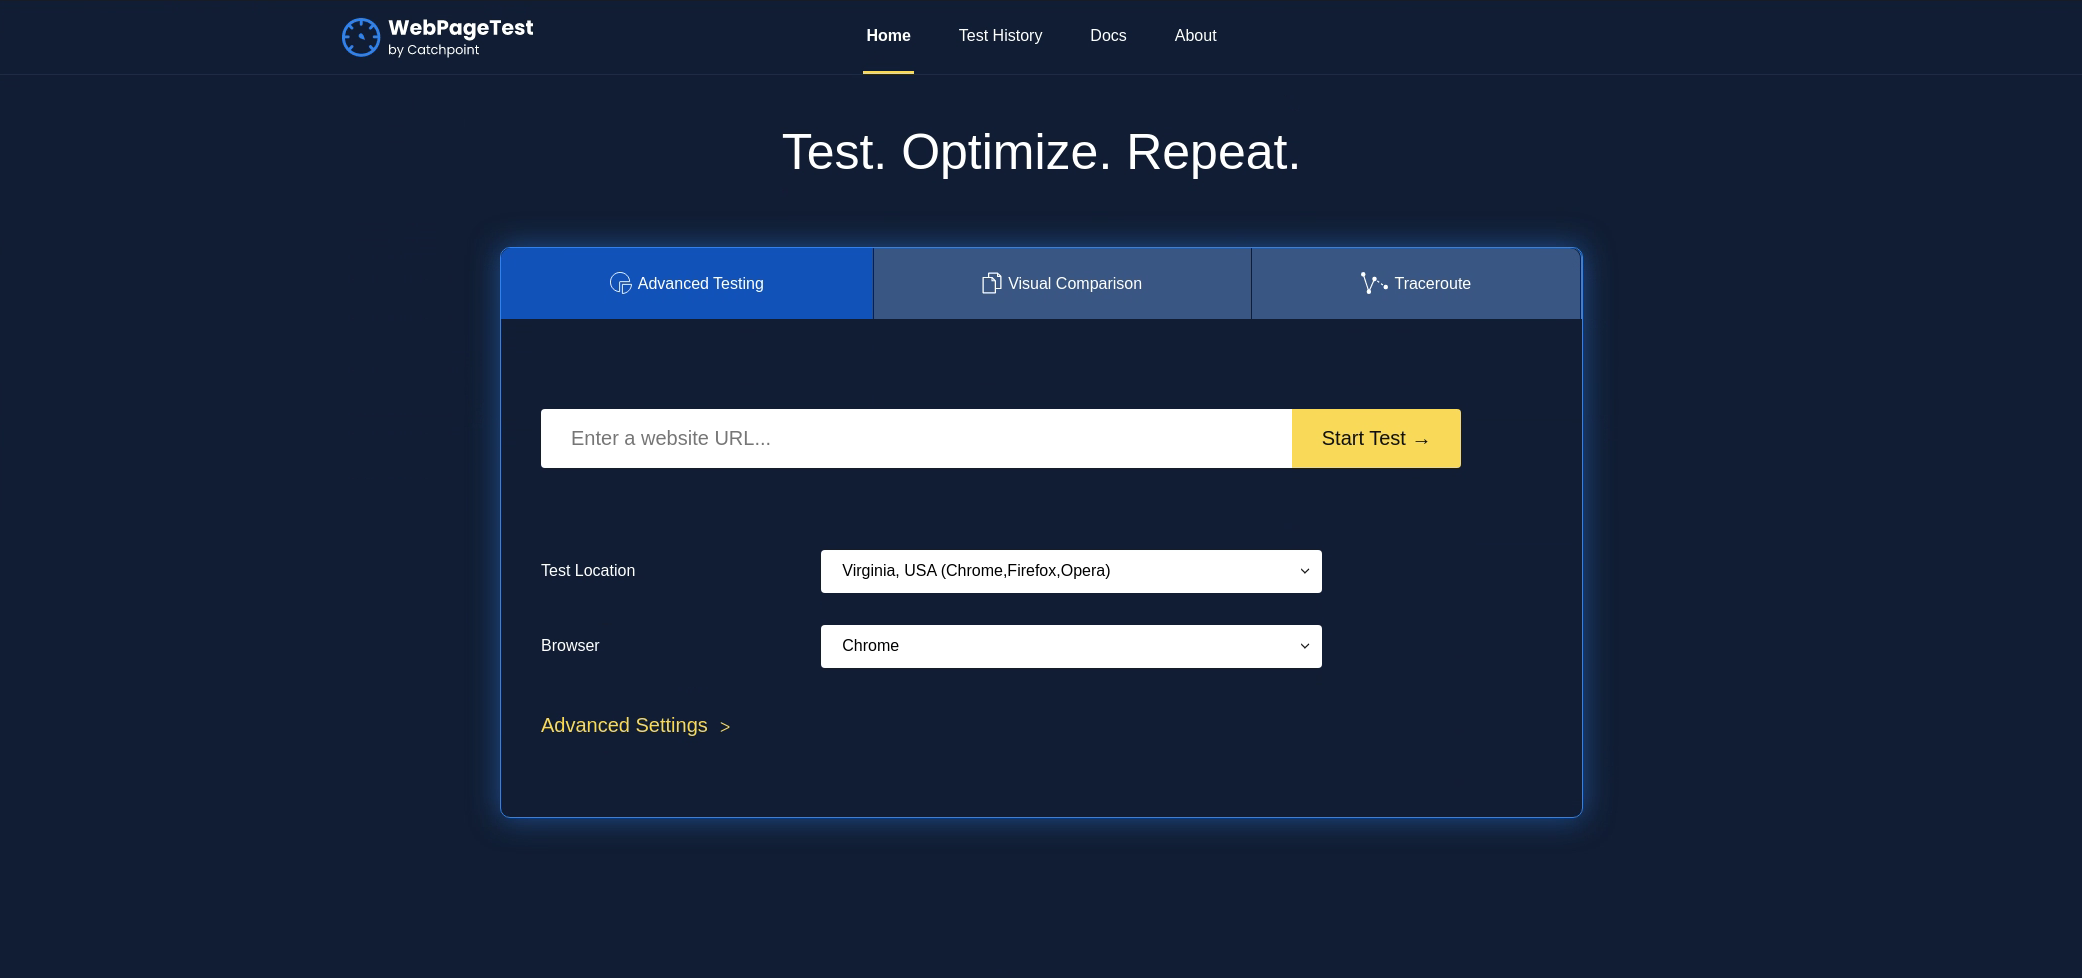
It asked us for a website URL to “start test”. I did not know what kind of test this was going to perform. For example, I just gave it https://example.com and saw what it did.
The application did something for a while and then gave me a nice screenshot of https://example.com with a lot of other performance metrics that I did not really know about or care enough to check.
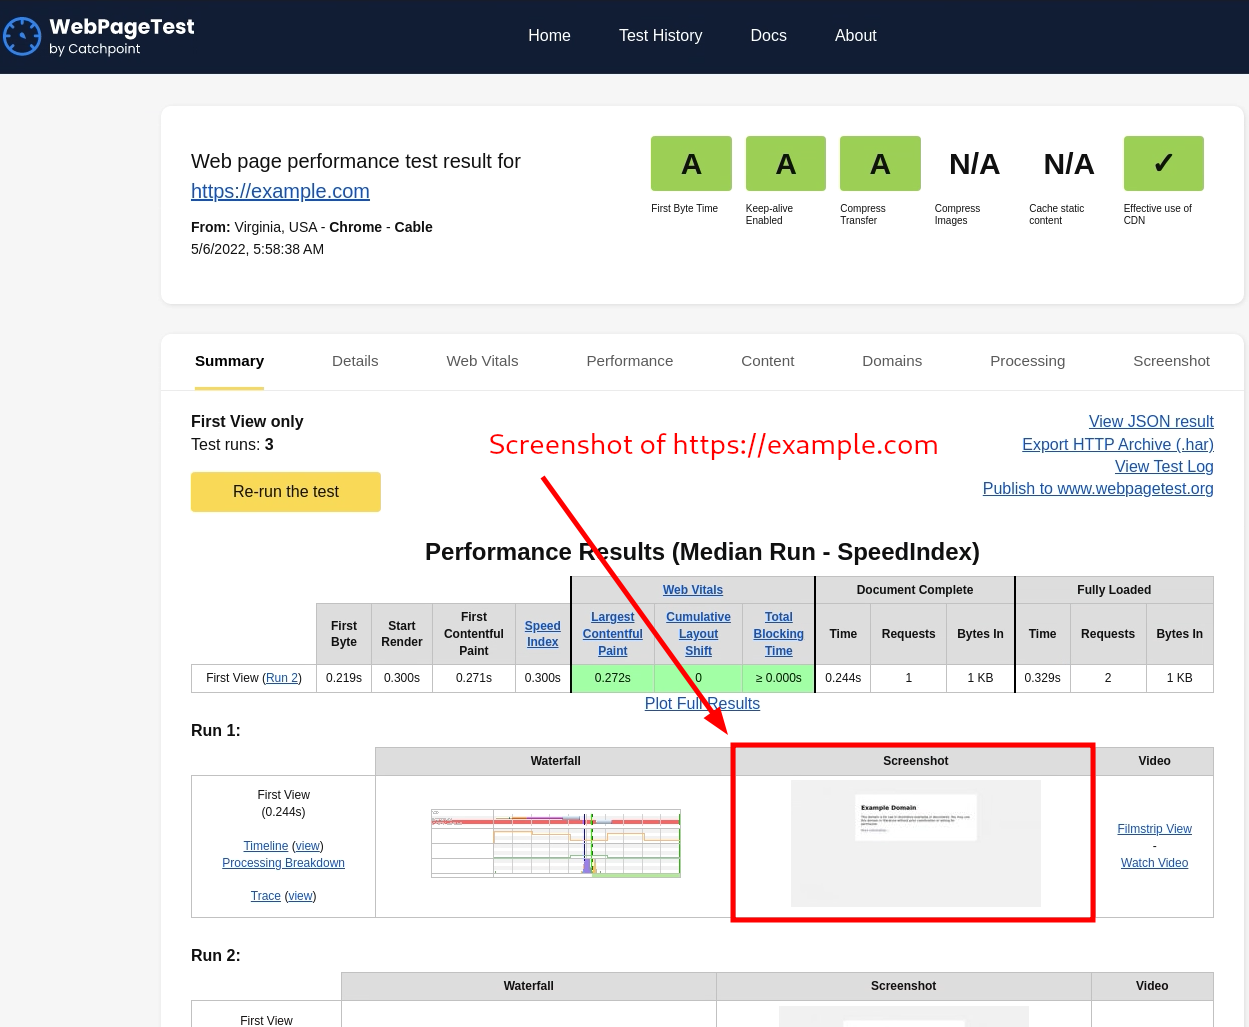
What I got interested in was the screenshot of https://example.com. The application sent a request to https://example.com and gave us its screenshot.
This is the intended behavior of the application and the ability to request arbitrary URLs is not a vulnerability in itself. The vulnerability arises when the application makes requests to restricted URLs like cloud metadata URLs or localhost that DO have sensitive information exposed.
Happy with what I saw, I gave it https://127.0.0.1 to “start test”.
It again did something for a while and gave me the results. This time, the results were quite disappointing.
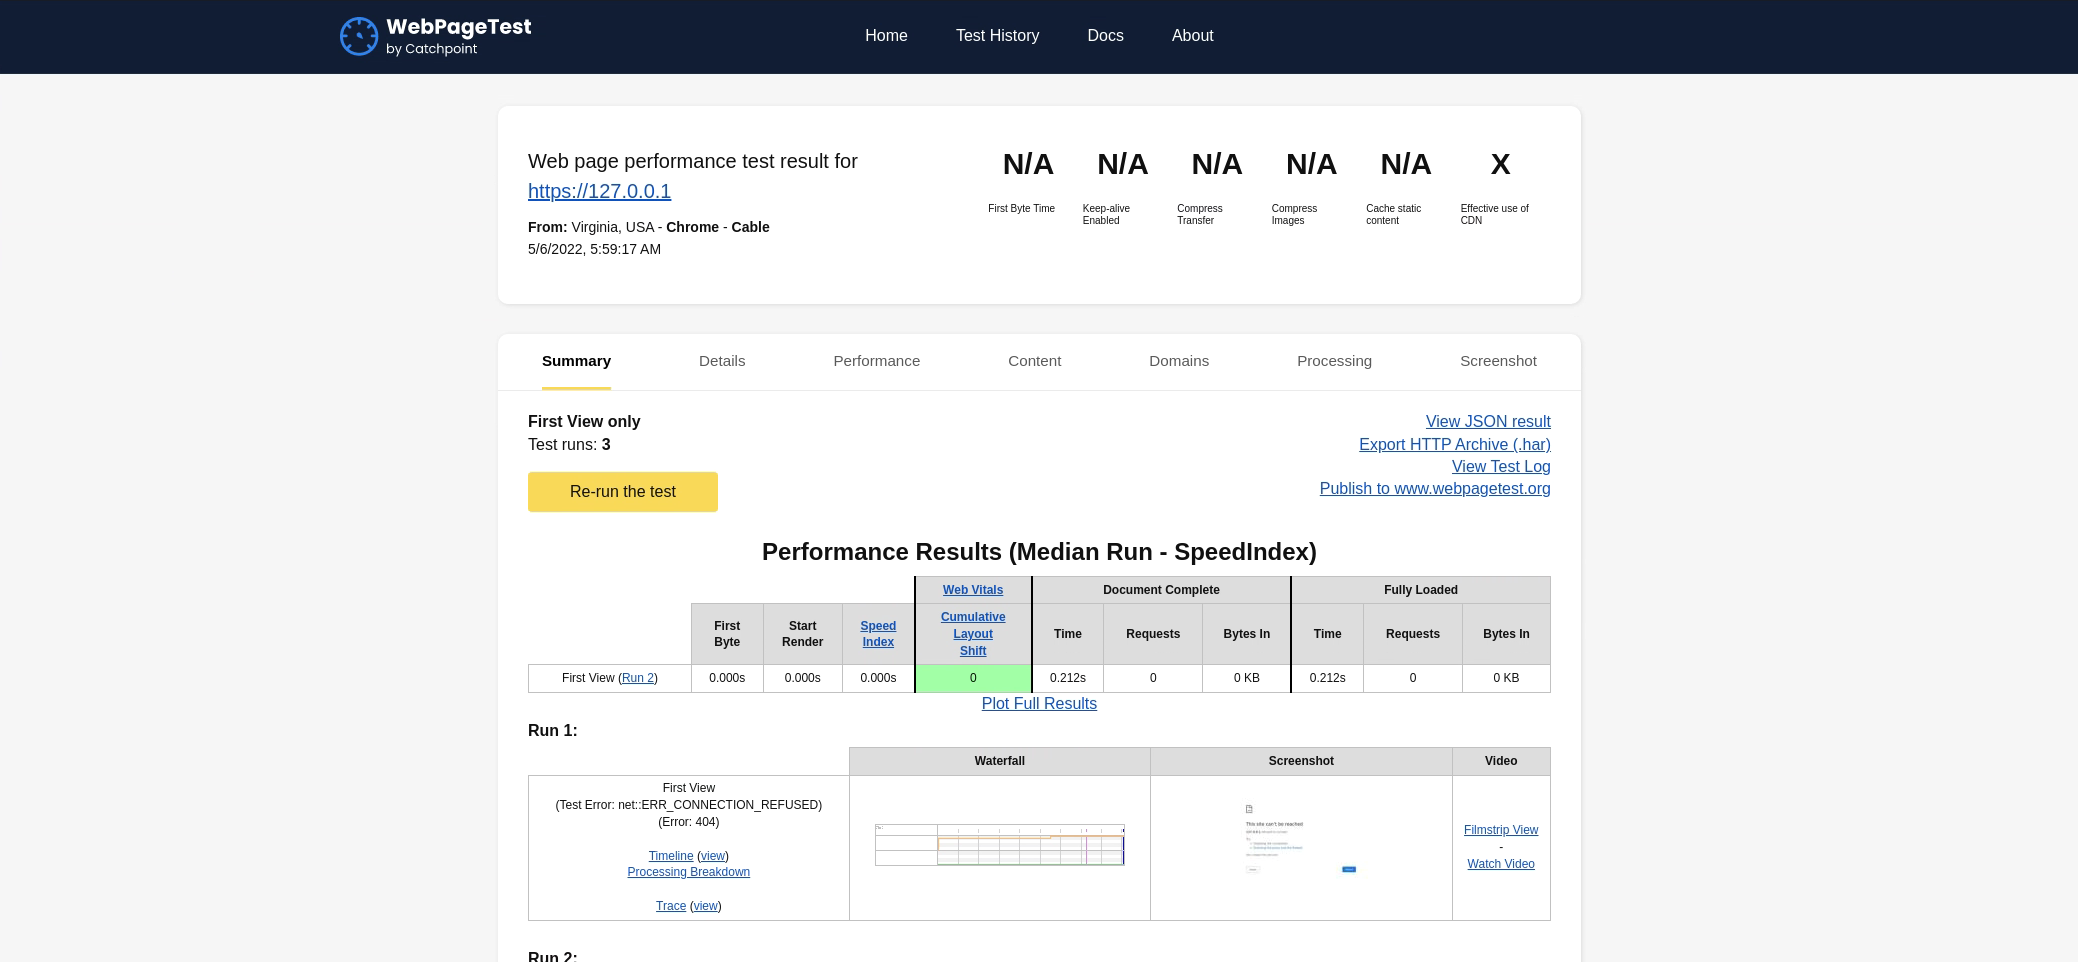
It showed an error saying “This site can’t be reached”.
I sent the request to Burp Suite Intruder and started doing a port scan of the top 1000 ports but it was taking a lot of time. All of these tests were taking 2-3 minutes to complete. Even if we consider the best case of 2 minutes to complete a test, we still require 2000 minutes which is 33.33 hours to perform a port scan of just 1000 ports.
This was the wrong way. To find a workaround, I played with the application’s settings and found an option to disable these “tests” that I thought took most of the time.
I disabled the tests and tried again. But the delay of 2-3 minutes was still there despite the tests being on or off. So I believe that it was some kind of internet issue or browser issue.
However, while testing this, I made a huge mess. Before you could submit a new URL to test, all the old URL tests were supposed to be finished. If they are not finished then the new URL tests will stay pending. And previously, I had sent 1000 requests to the server for port scanning.
This means I cannot test further without waiting for 33.33 hours. I wished someone would reboot the server so that I did not have to wait that long but the server seemed to be unused as no one sent any tests during these 33.33 hours. I also checked the old tests but there were no tests before I sent mine.
After two days, I checked and all the tests were finished. I scraped the results, found all the screenshots, and downloaded them.
Upon checking all the screenshots, I was disappointed once again as none of the ports were running HTTP services. Even after waiting for two days to see the results, nothing was found.
I tried the file:// protocol to retrieve /etc/passwd but that also did not work.
I went ahead to try and retrieve the cloud metadata. This should have been the most obvious choice to me as the client hosted all their infrastructure on GCP. But while hacking this, I was more curious about internally exposed services than cloud metadata.
To retrieve Google metadata, we need to request http://metadata.google.internal/computeMetadata/v1/ URL with two custom headers that are as follows:
- X-Google-Metadata-Request: True
- Metadata-Flavor: Google
Luckily, the application also provided functionality to add additional headers before you start the web page test.
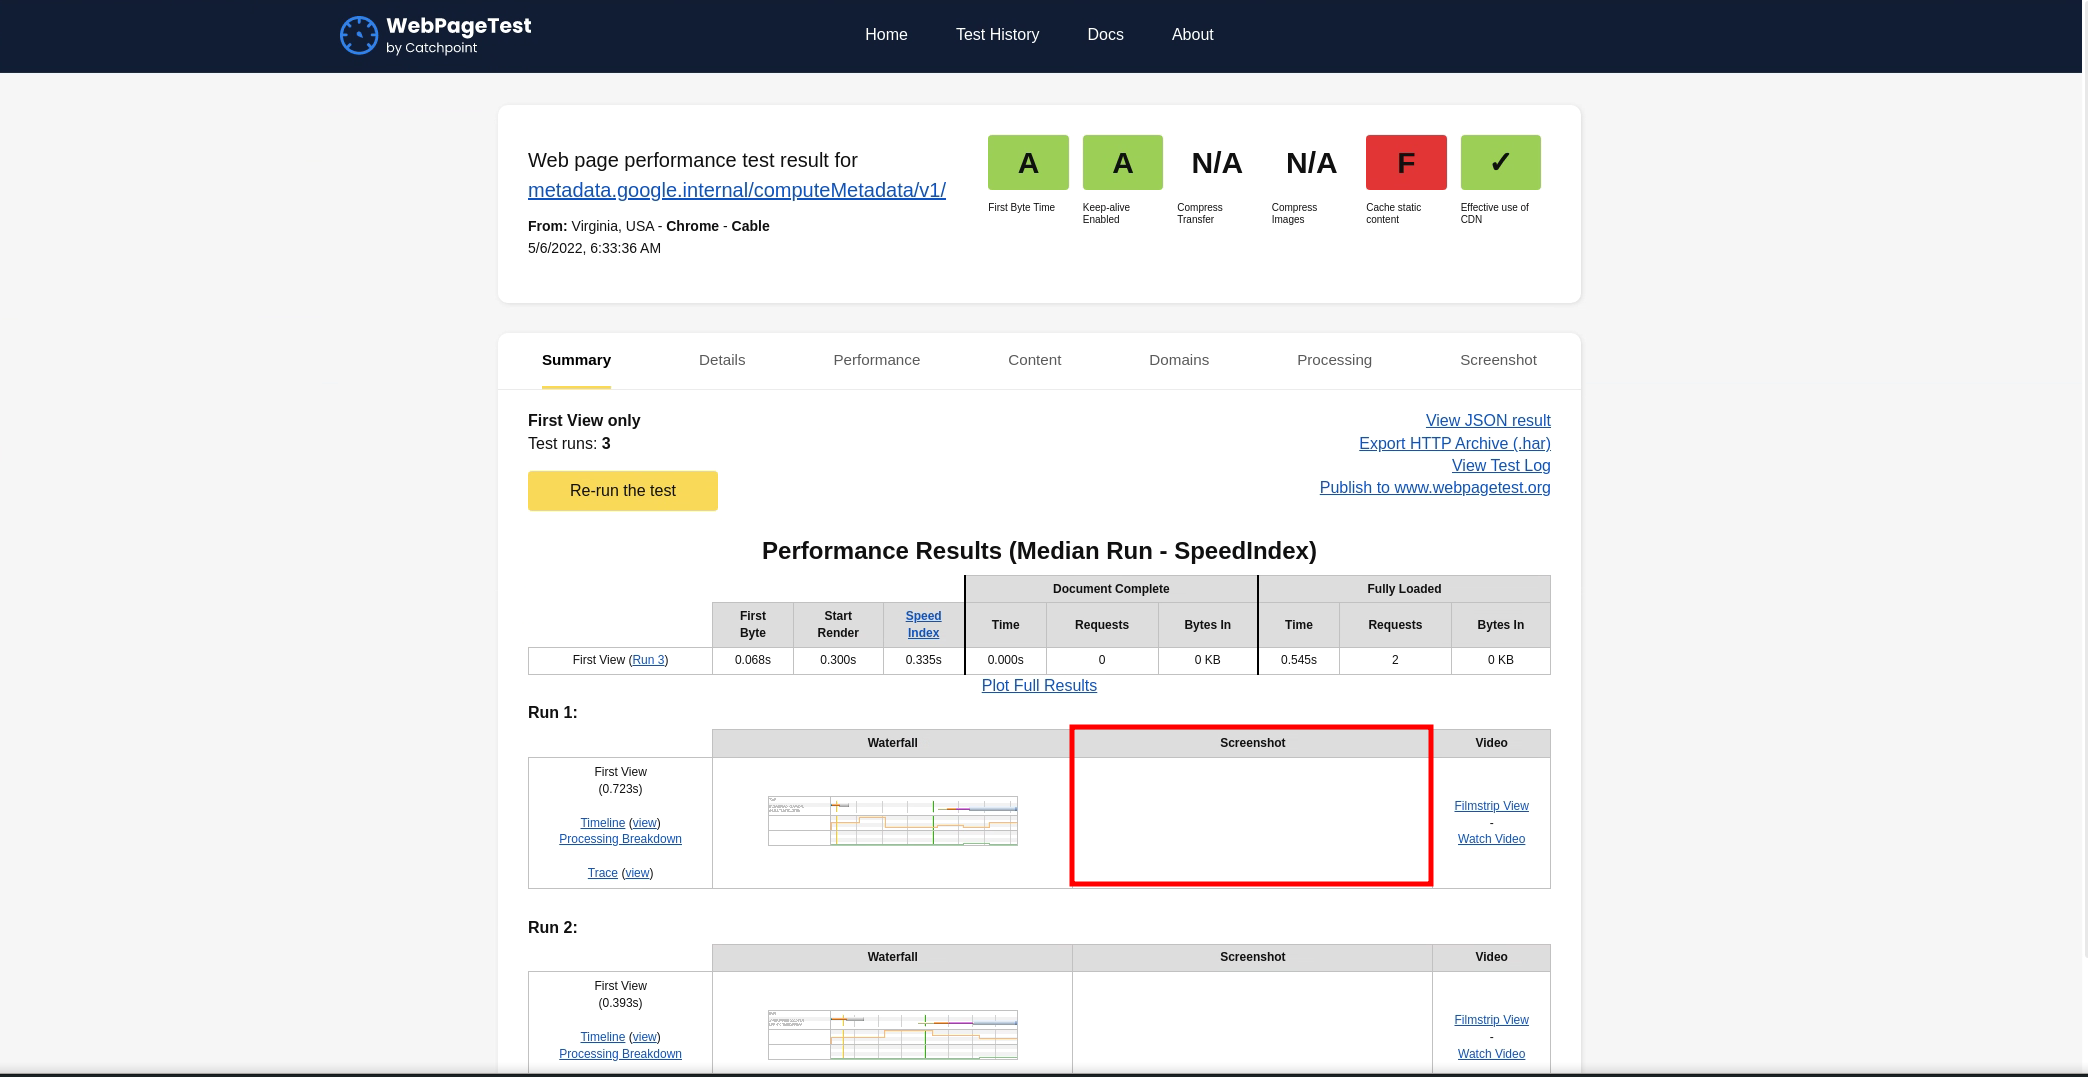
I added the headers and started the test on http://metadata.google.internal/computeMetadata/v1/ URL. It took more than 2-3 minutes to finish this time so I got excited. But I was once again met with disappointment as this resulted in an empty screenshot.
I gave up with the cloud metadata thing and tried to check a few common ports like 8080, 8125, 80, 5000, etc. This also resulted in the same output as my previous attempts for a port scan. I decided to step away from this and take a little break.
After 5 days, I was again hooked on retrieving the Google metadata. This time I tried with several other endpoints like:
/computeMetadata/v1/instance/hostname/computeMetadata/v1/instance/id/computeMetadata/v1/instance/image
The list goes on but you get the point. I tried many other endpoints. I also used the much useful Cloud Metadata Wordlist Gist. However, none of these endpoints seemed to work in my case.
I then simply googled “google cloud metadata” and the very first result was the official documentation on how to access the VM metadata. As I was reading it, it mentioned the following endpoint:
/computeMetadata/v1/instance/tags
I gave the same endpoint to the application for testing and to my surprise, it gave me the output!
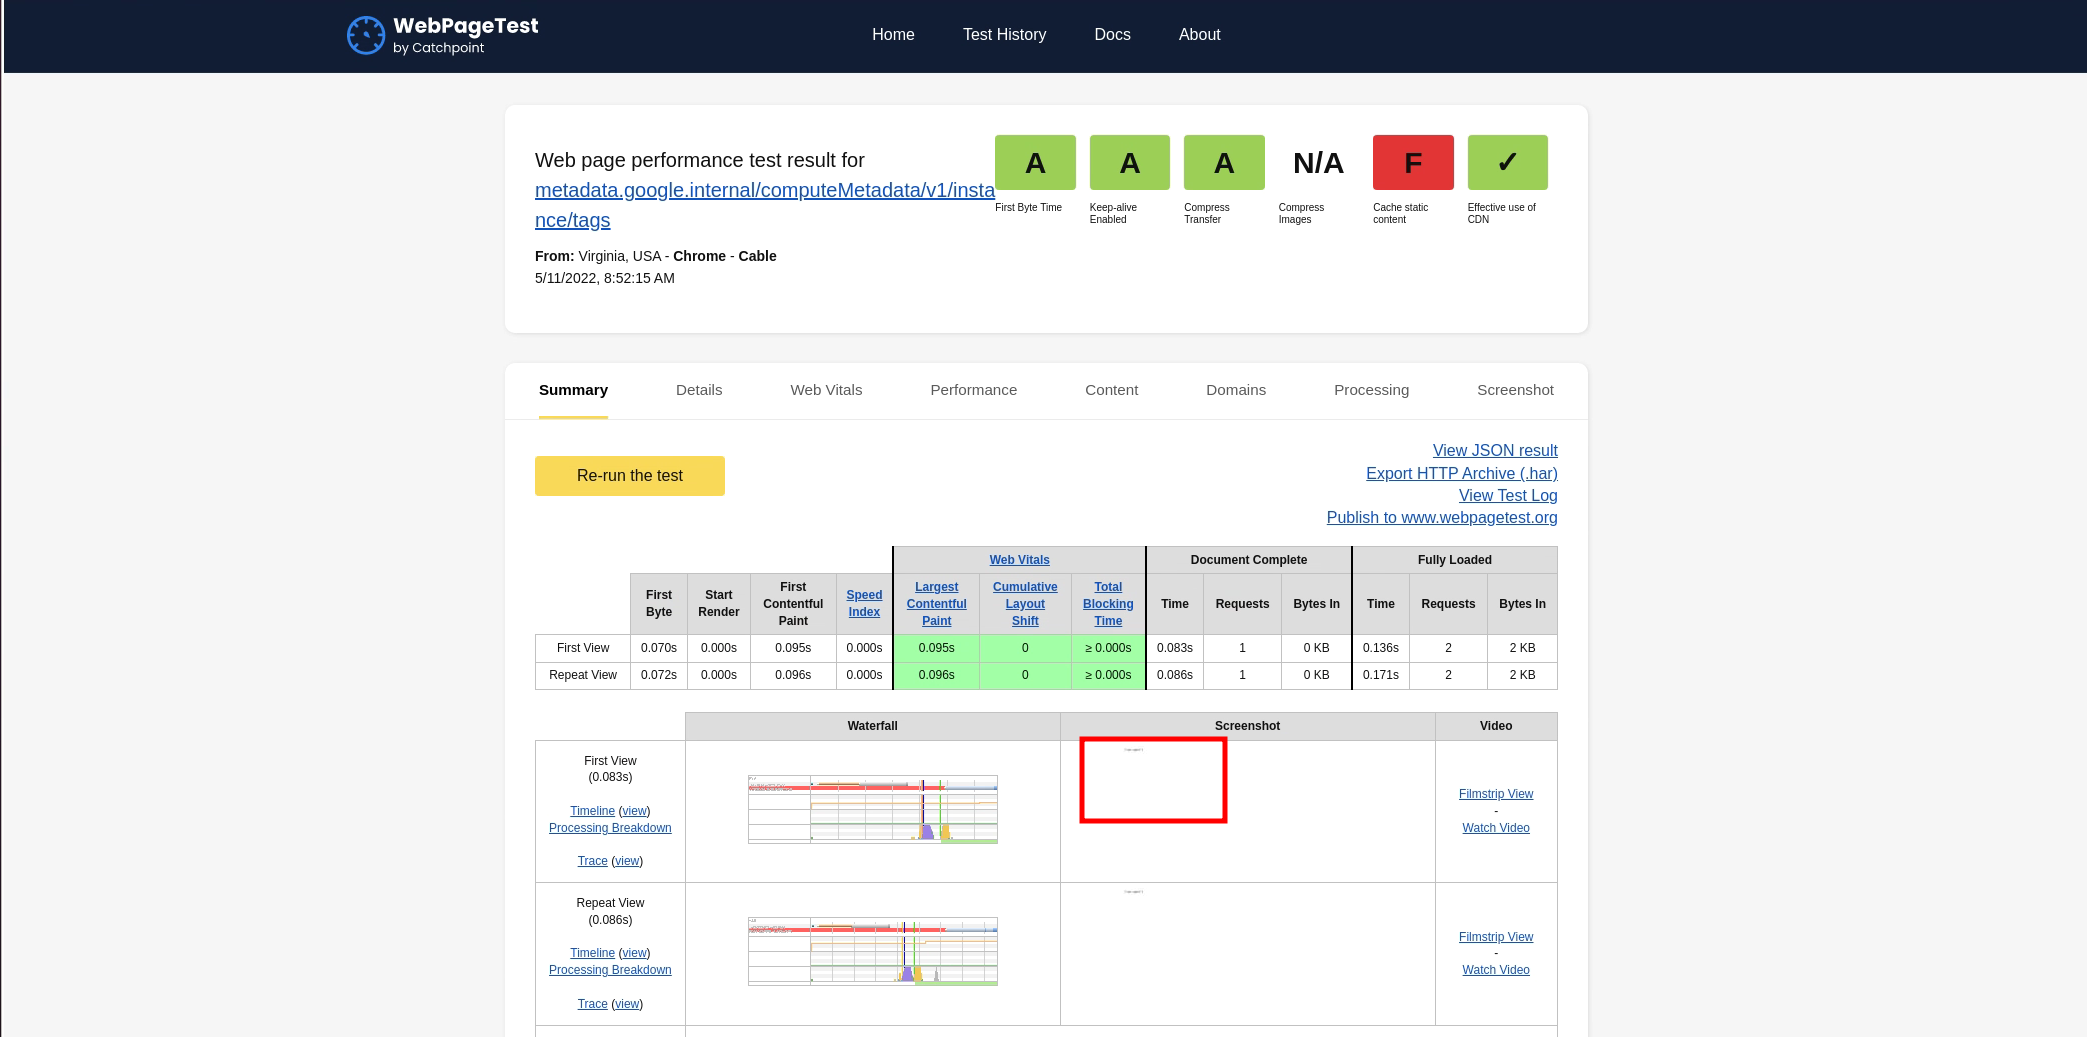
Here, the screenshot quality was really bad. It was too small that it was unreadable. To view metadata that makes some sense to us, we need to find some other way.
After poking around with different features, I found one way to view the resulting HTML content. All I had to do was to click on the “View JSON result” button. After clicking, the application showed the performance metrics and all the other information in JSON format.
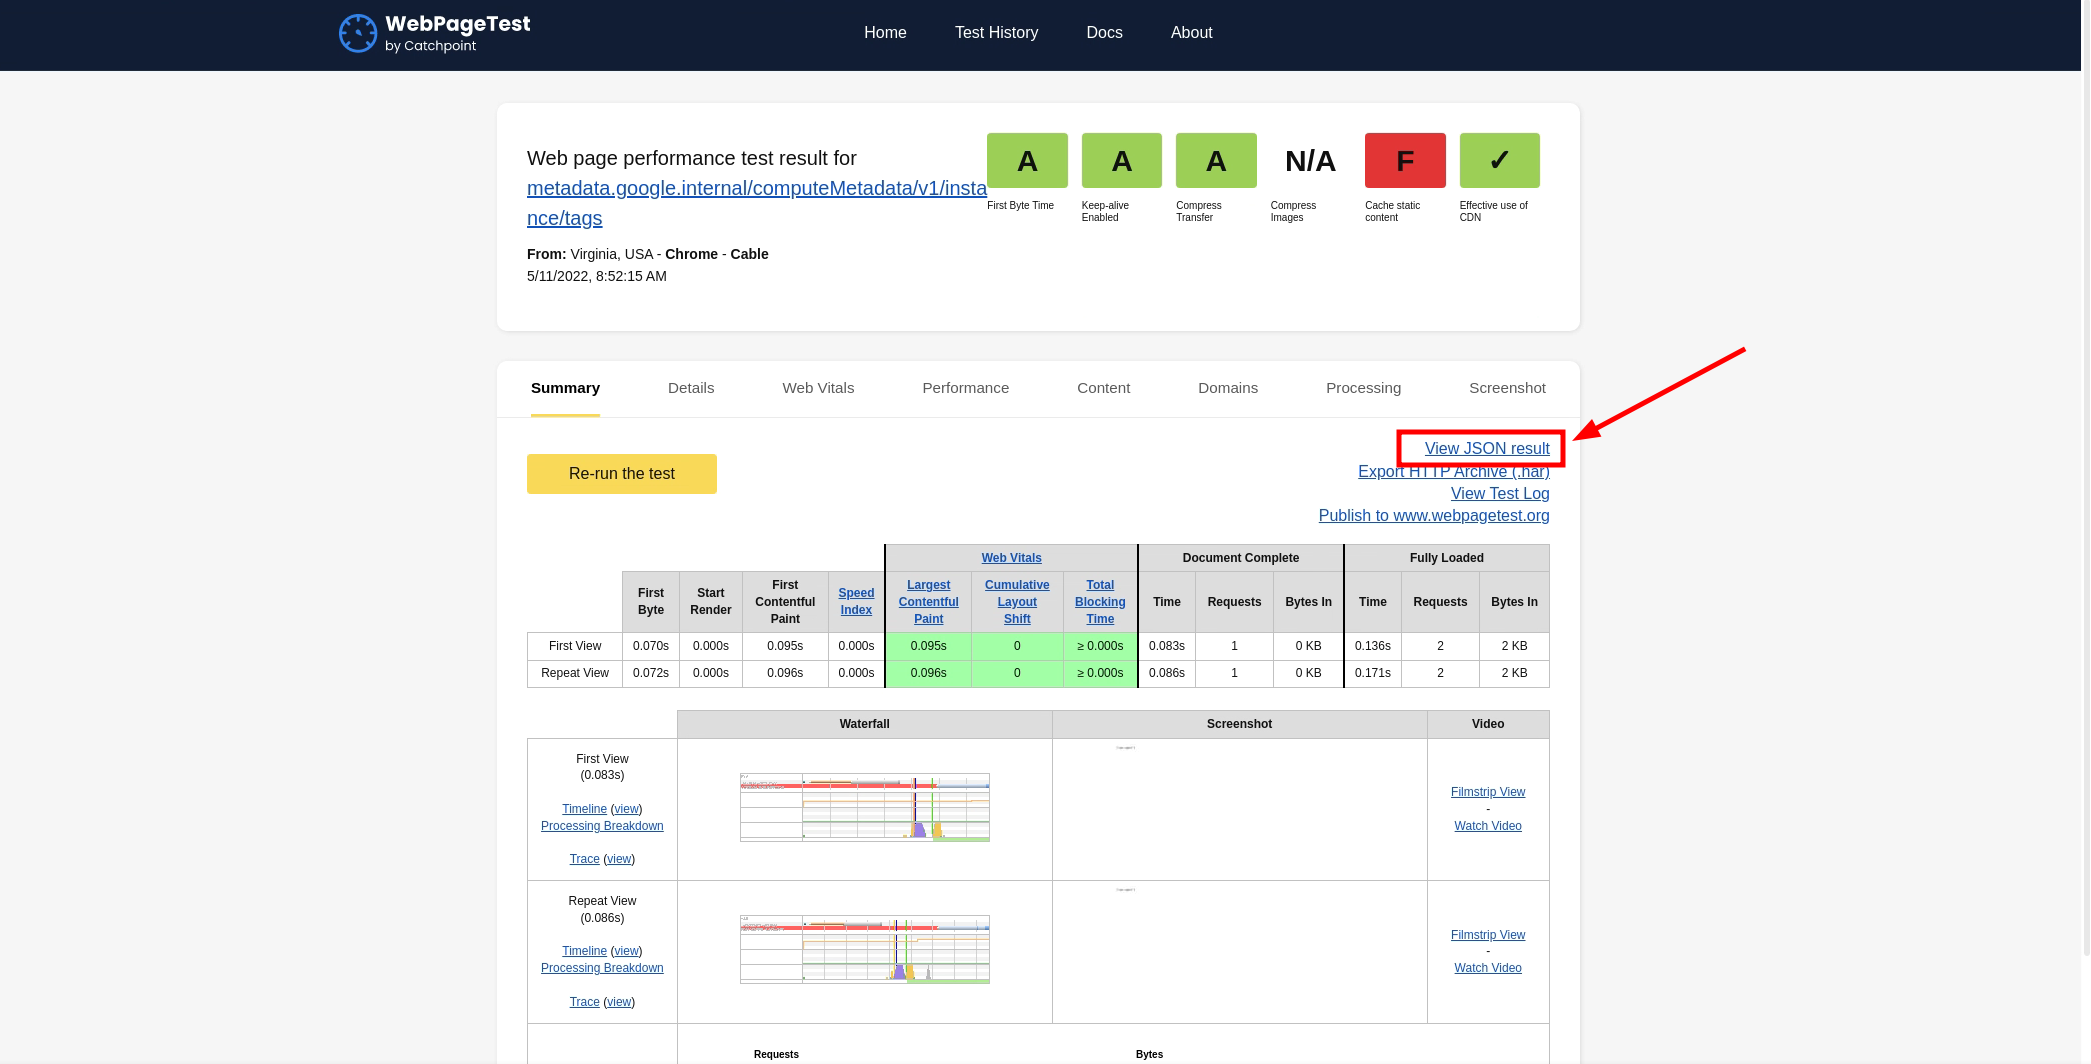
Here, I was able to see the resulting HTML content in a JSON field called “html”.
I again checked the Cloud Metadata Wordlist Gist and found out that I did not check one endpoint shown in the wordlist. It was the following endpoint:
/computeMetadata/v1/instance/disks/?recursive=true
I quickly entered this endpoint and checked the HTML in JSON result and found out that it successfully listed all the disks!

Reported this with all the required pieces of evidence and this was accepted.
The same application offered other functionalities like running a custom testing script, bulk testing, bulk testing using file upload, etc. And all of them were vulnerable to this.
I will not be explaining each of them but an exploit using a custom testing script looked like this:
addHeader Metadata-Flavor: Google
navigate http://metadata.google.internal/computeMetadata/v1/instance/disks/?recursive=true
SSRF Allowing To Access Internal Ports⌗
The web application root of this IP showed a search functionality as shown below.
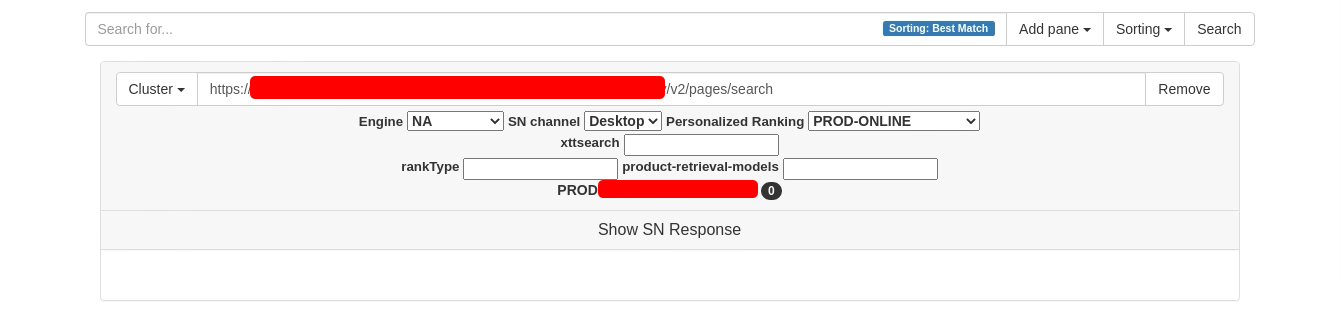
Here, you can see that a URL is shown beside the “cluster” drop-down. We can change the cluster dropdown to other options that will change the URL. My best guess is that we can change the cluster to switch between dev/prod environments.
Upon searching a string “test”, a POST request to the /search endpoint is sent along with a lot of other parameters.
A detailed breakdown of a few crucial parameters is shown below:
| Parameter | Explanation |
|---|---|
| url | This was the URL to which the search request was sent. If you change the cluster using the drop-down, this URL will change. |
| sortby | This was the column/criteria on which the result would be sorted. |
| sortorder | Ascending or descending depending on the value. |
| keyword | The keyword to search in the cluster. |
| page | This was used for pagination purposes. |
| storeid | The store identifier in which we had to search |
From the parameters, I assumed that a sequence similar to the following might be used by the web application:
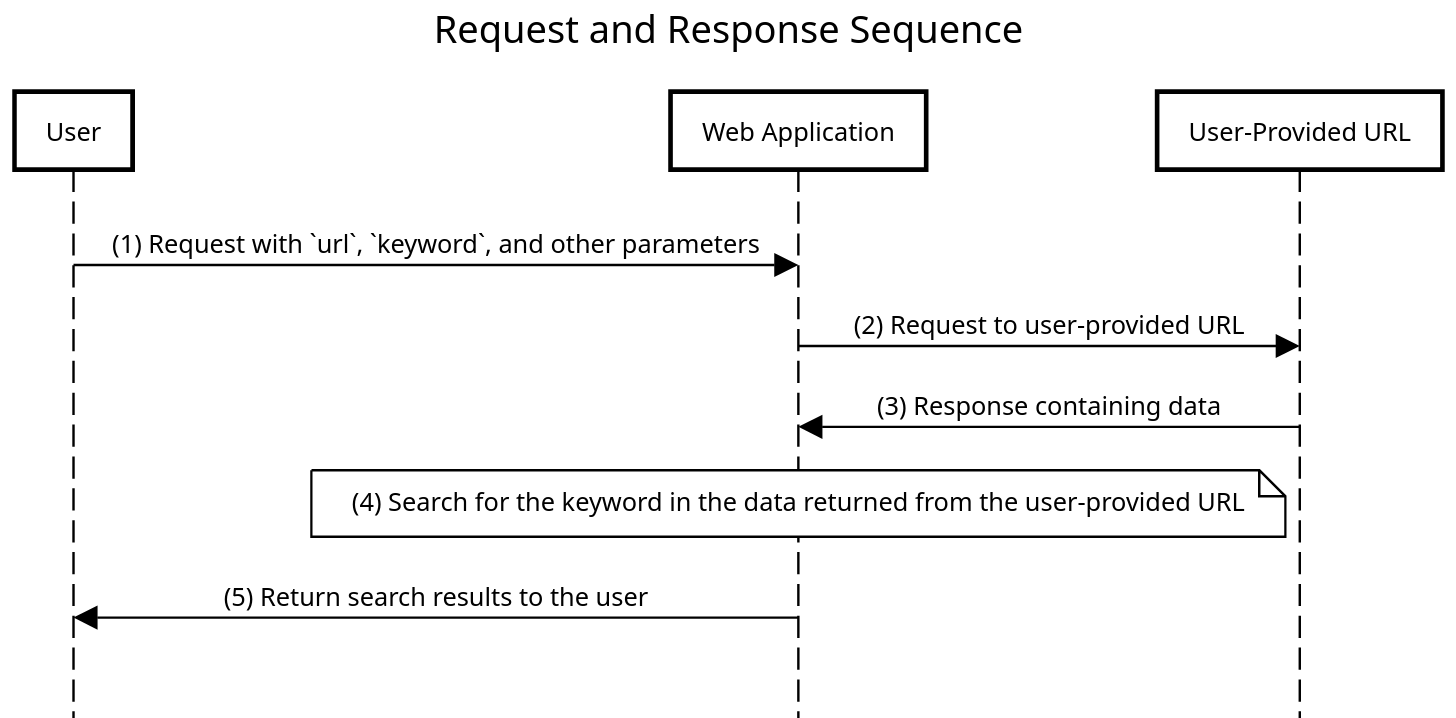
Here, the url parameter directly clicked as an SSRF in my head but I kept it in side and started hunting for SQL injections.
I tested all the parameters and all the cluster URLs to see if any of them is vulnerable to an SQL injection or not. But all of them were secure and SQL injection was not possible in any of the clusters.
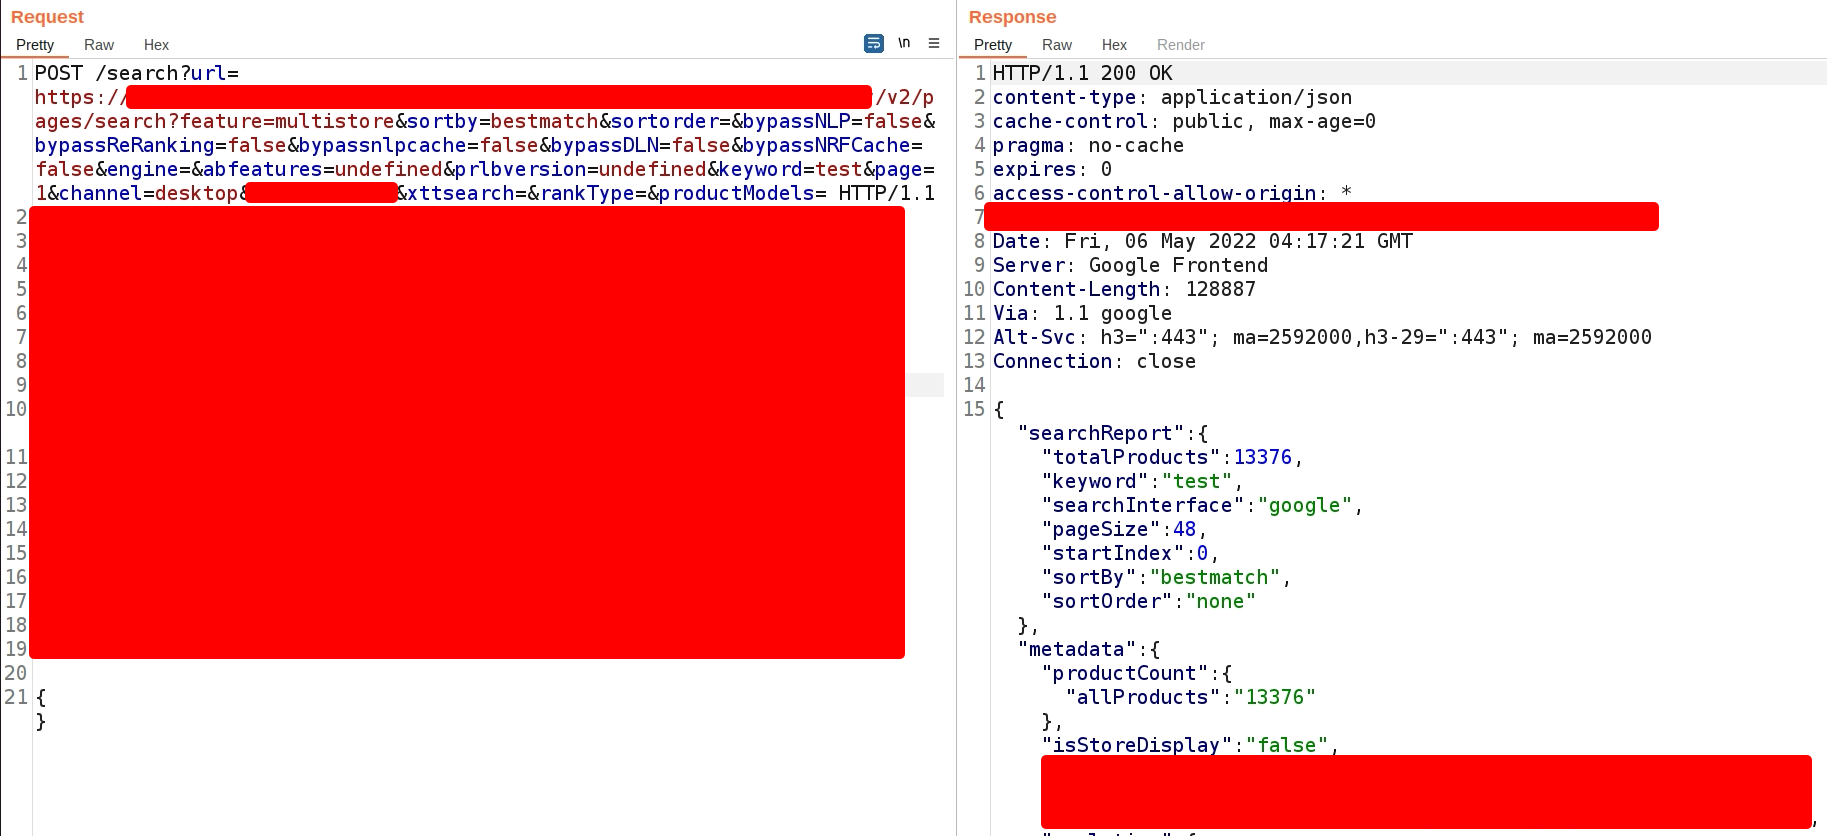
Now, back to the SSRF, I changed the url parameter to my TUPoC URL and I saw that the server now responded with a JSONDecodeError and a detailed stack trace.
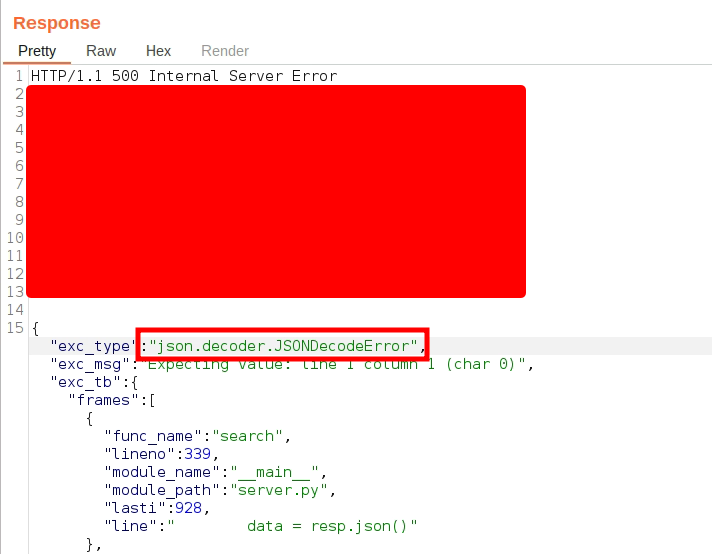
You may be wondering, “Why does this exception occur?” This is because the web application is trying to JSON decode the data returned from our TUPoC URL but our TUPoC URL is not sending valid JSON data. It is sending normal HTML.
By taking advantage of this verbose error, we can enumerate open HTTP services on the vulnerable server.
The thought process behind this is that, if a web service is running on the server, it will return some HTML data. The web application will try to JSON decode HTML data and hence an exception will be thrown. This way, we can enumerate open HTTP ports.
I quickly sent the request to Burp Suite Intruder and changed the url parameter to http://127.0.0.1:§1§ and ran intruder from 1 to 5000 to fuzz the top 5000 ports.
Once the attack was complete, I found that port 5000 was open and running the vulnerable service.
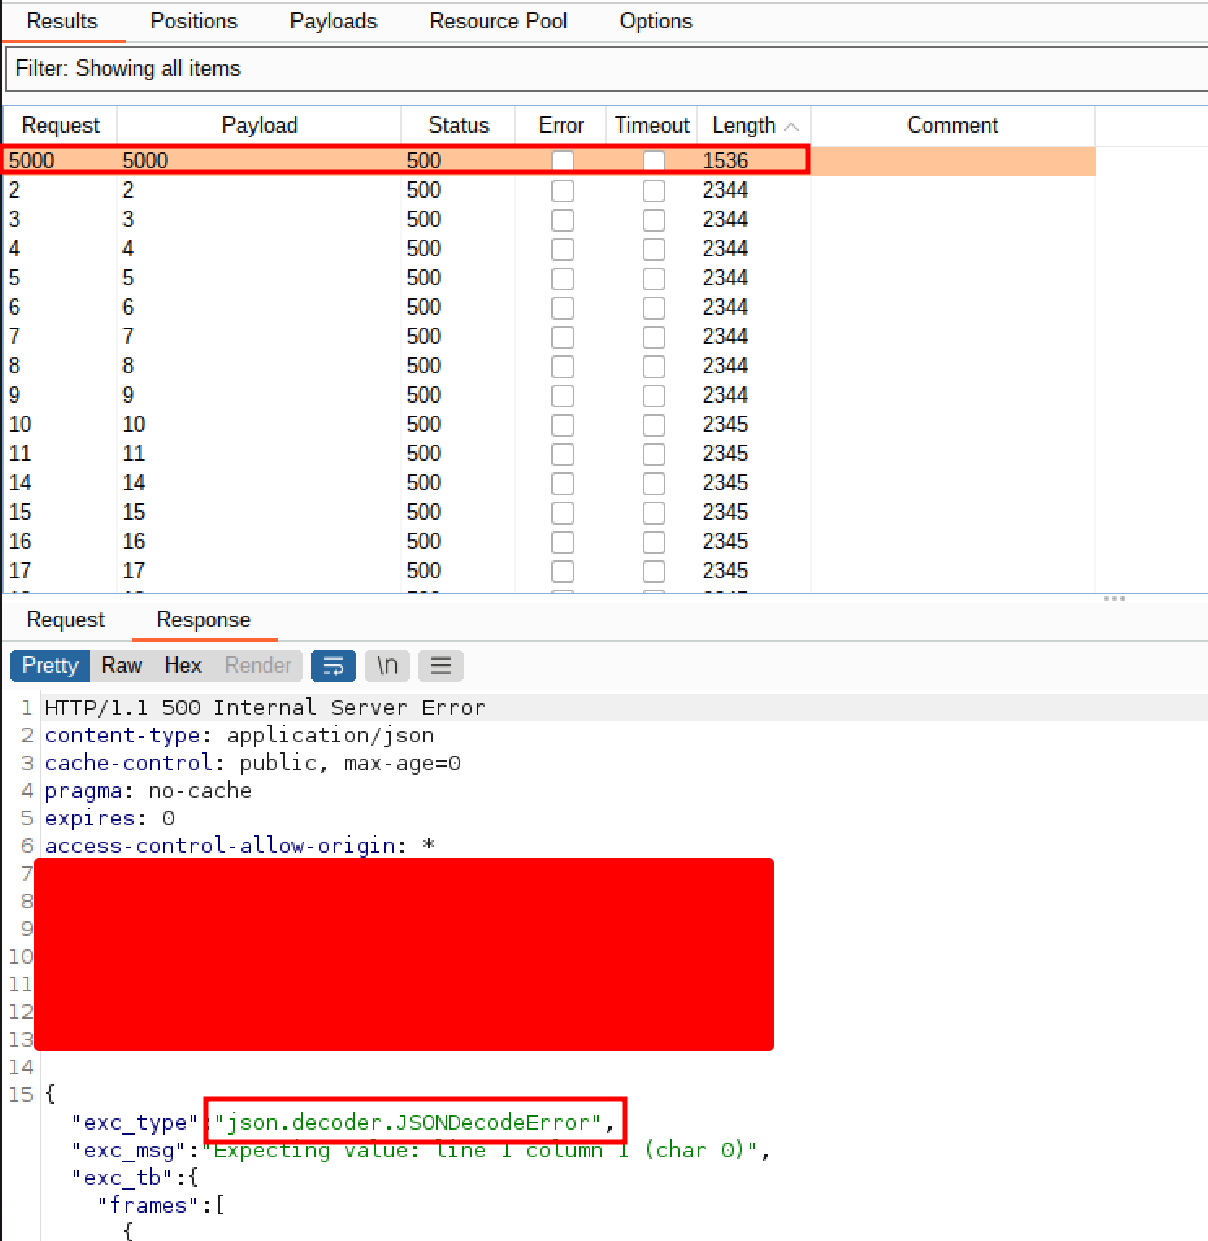
All the other ports returned a ConnectionError exception.
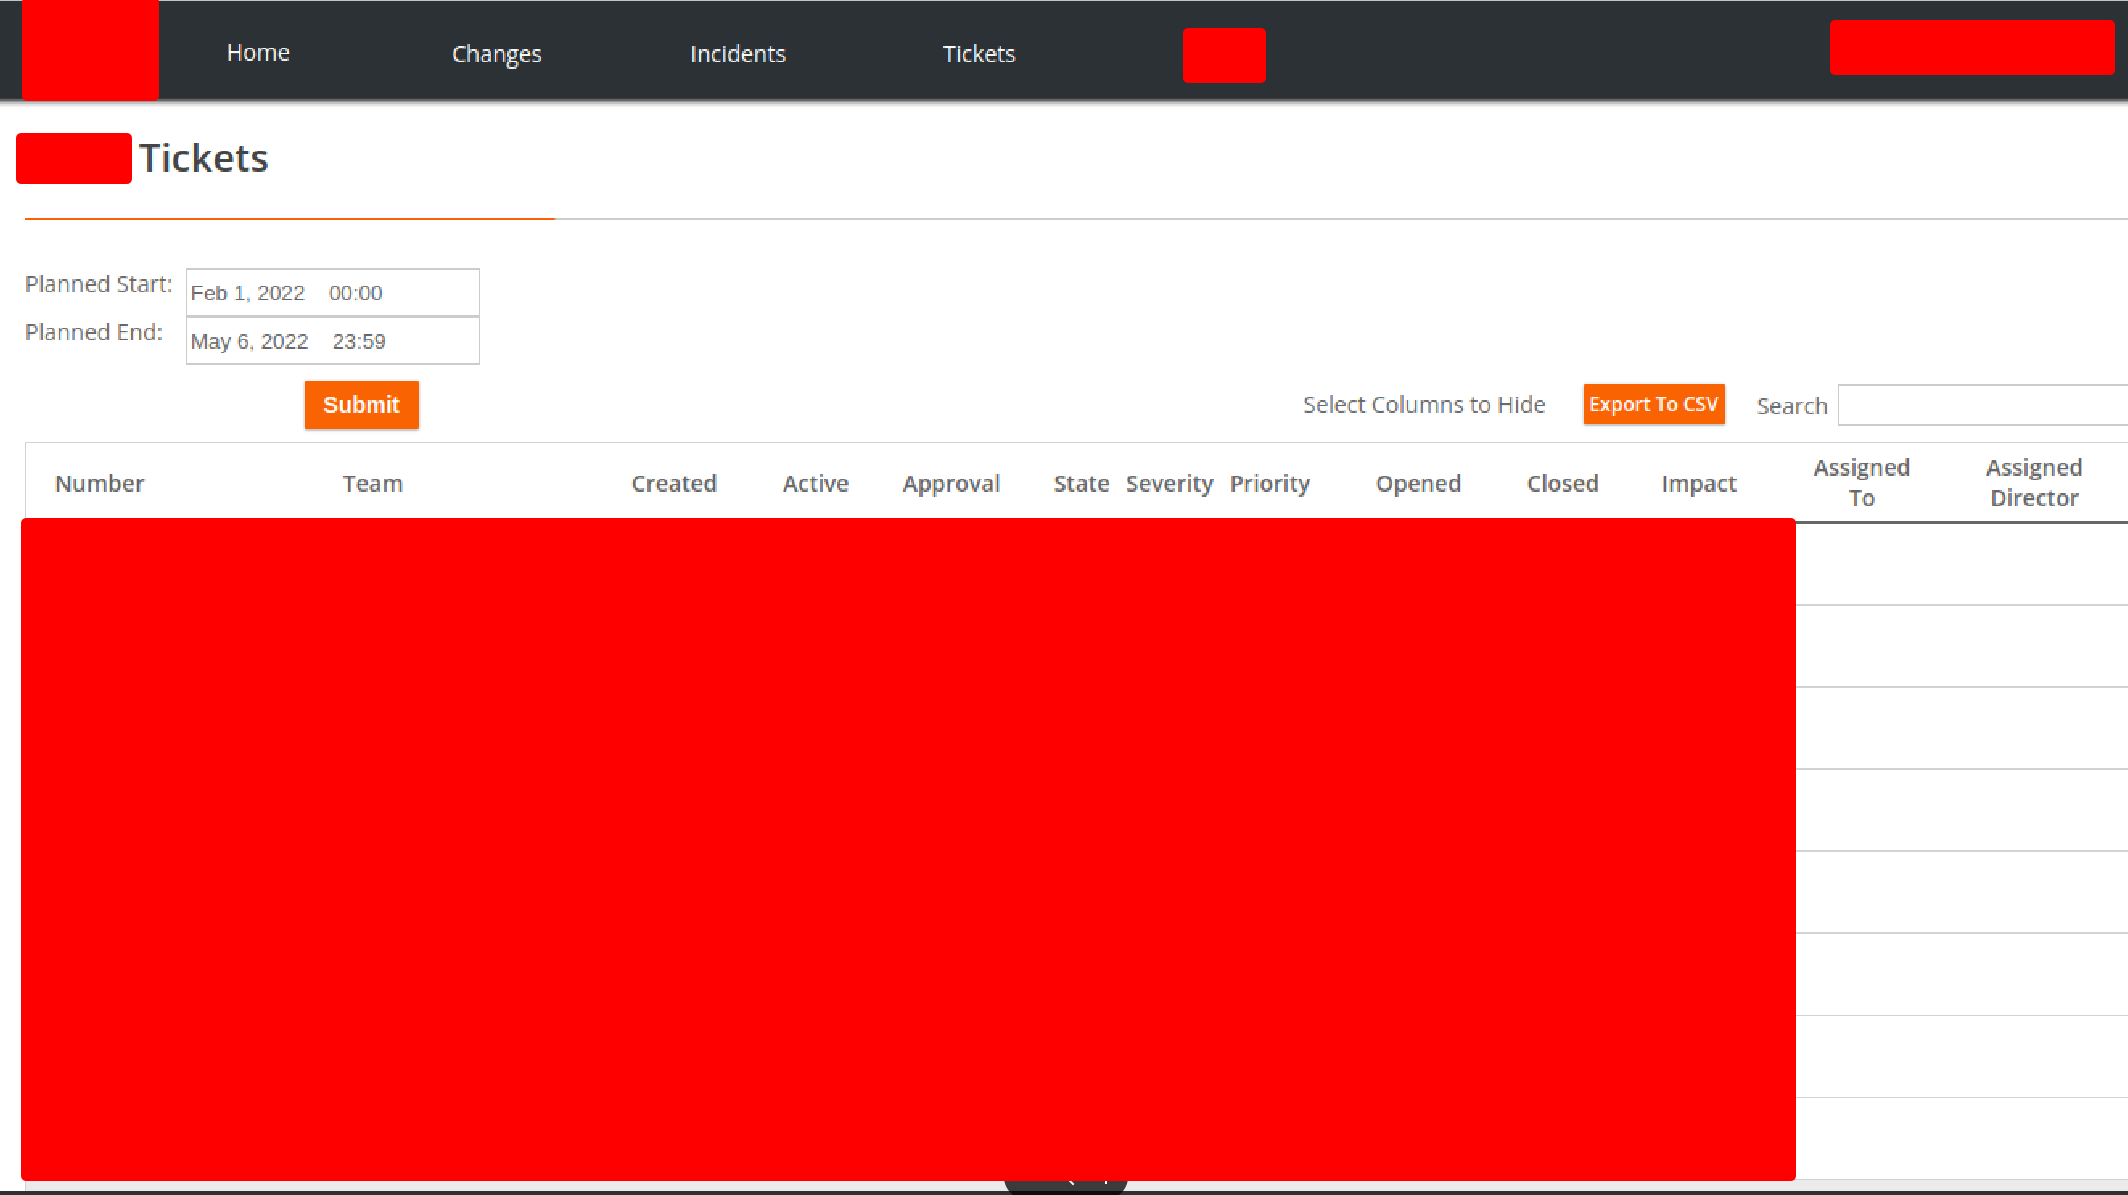
Exposed XXXX Portal Revealing Tickets⌗
Once again, the web root of this host showed some kind of dashboard that I found interesting.
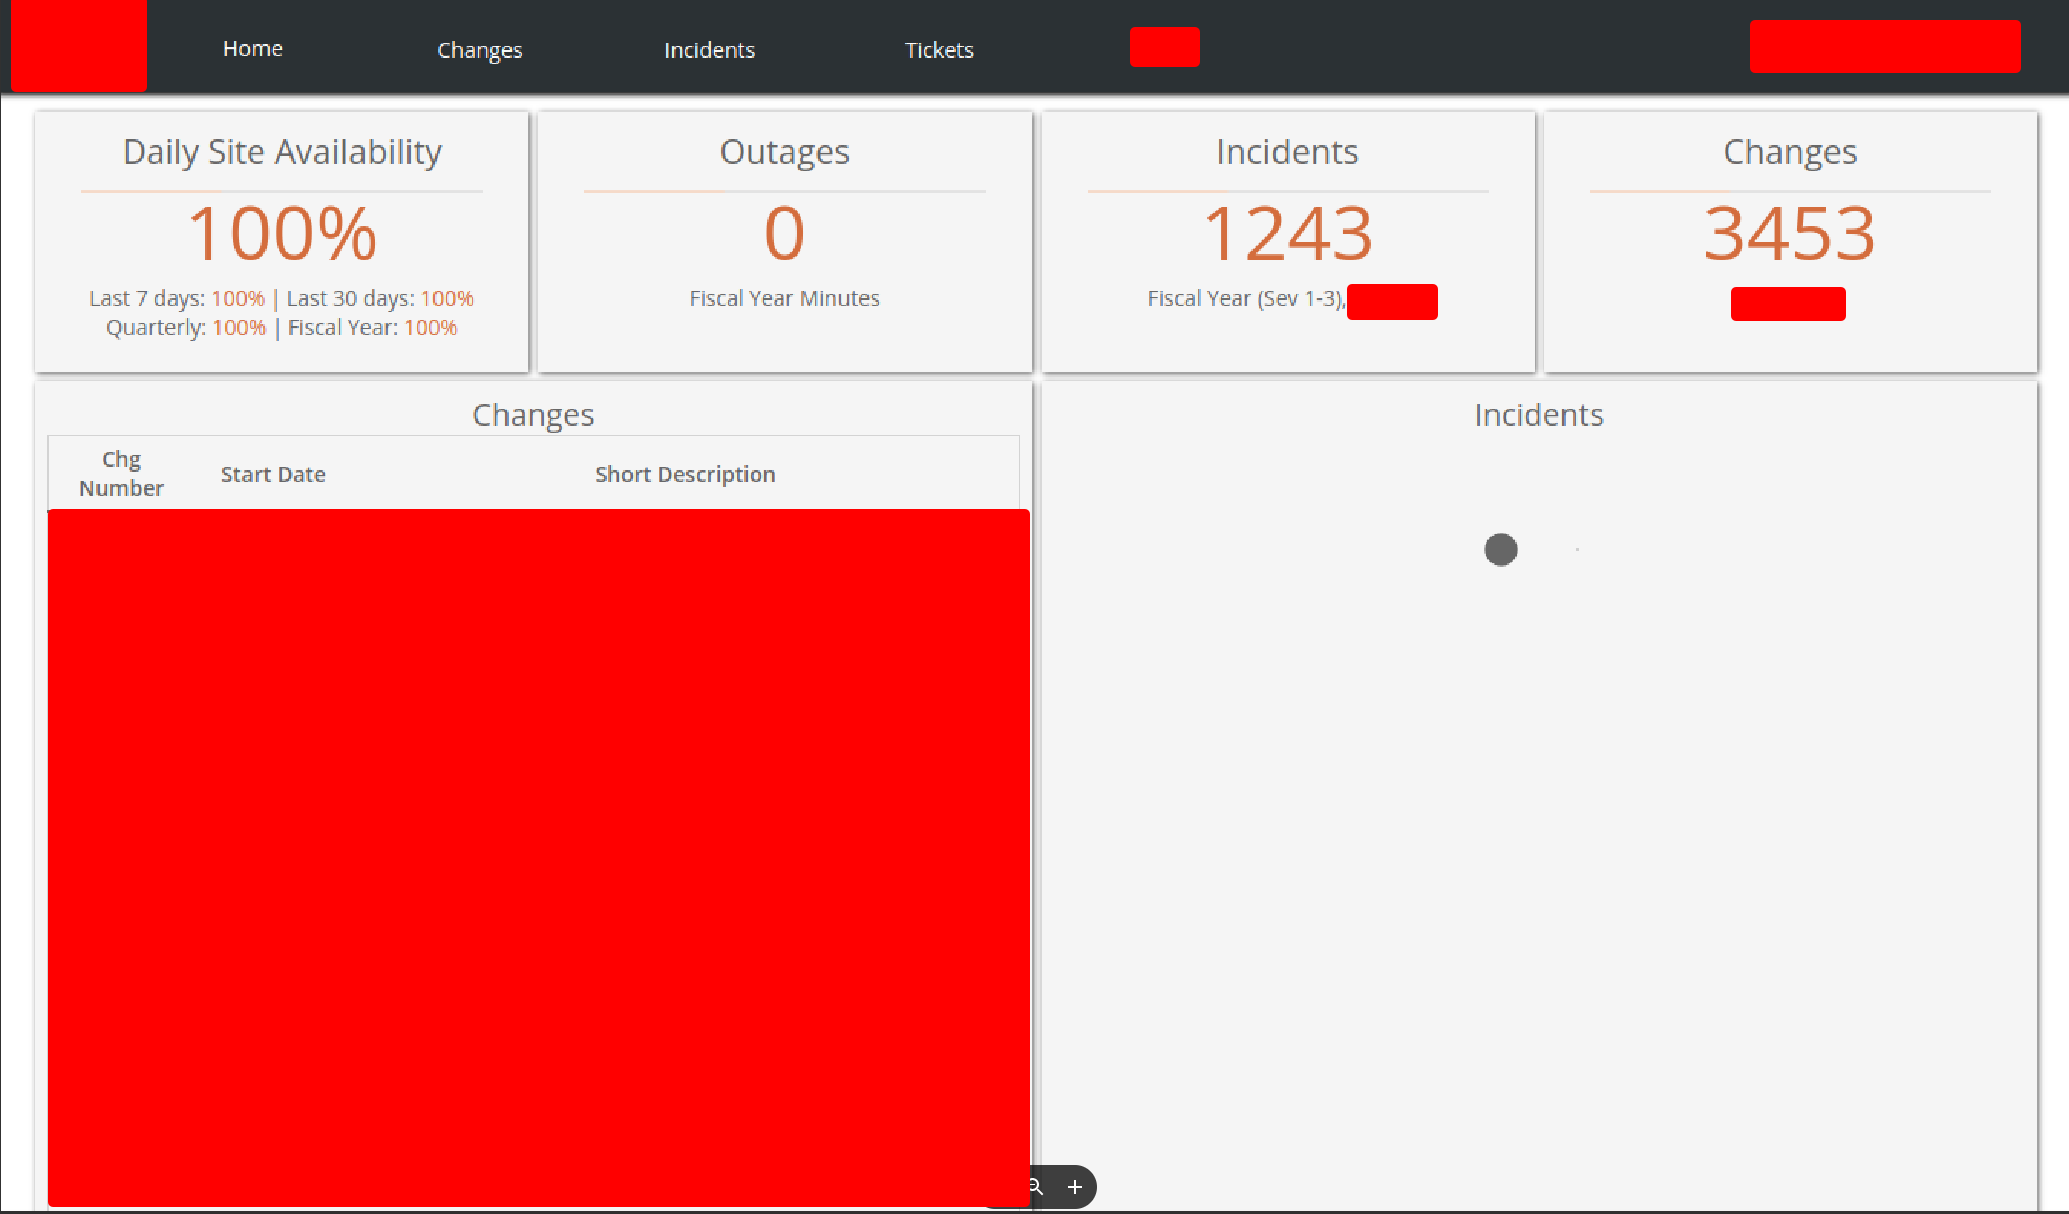
It was showing different functionalities like incidents, tickets, changes, etc. The API was restricting access to some of the functionalities. However, only some of the functionalities were protected and most of the functionalities were accessible without any sort of authentication.
Here, I was able to view all the open tickets.
Takeaways⌗
- Collaborate with like-minded people.
- Do not give up if your way of exploiting does not work. Take a break and try again.
- Hacking is not as easy as I made it seem in this blog post. Sometimes I hack for more than 12 hours without finding a vulnerability or even something to play with. And sometimes I get lucky and find multiple vulnerabilities with something as simple as aquatone.
- Take vacations/holidays.
Thanks for reading. :)
If you have any questions, you can reach me out on Twitter at @kuldeepdotexe.
Happy hacking!